COTTON CREEK COURSE
Featuring rolling fairways and large undulating greens, Cotton Creek at Craft Farms Golf Course is very playable from the forward tees and a true championship challenge of over 7,000 yards from the tips. True to its Palmer design, this traditional 18-hole masterpiece was laid out to challenge rather than intimidate, with numerous risk/reward opportunities throughout.
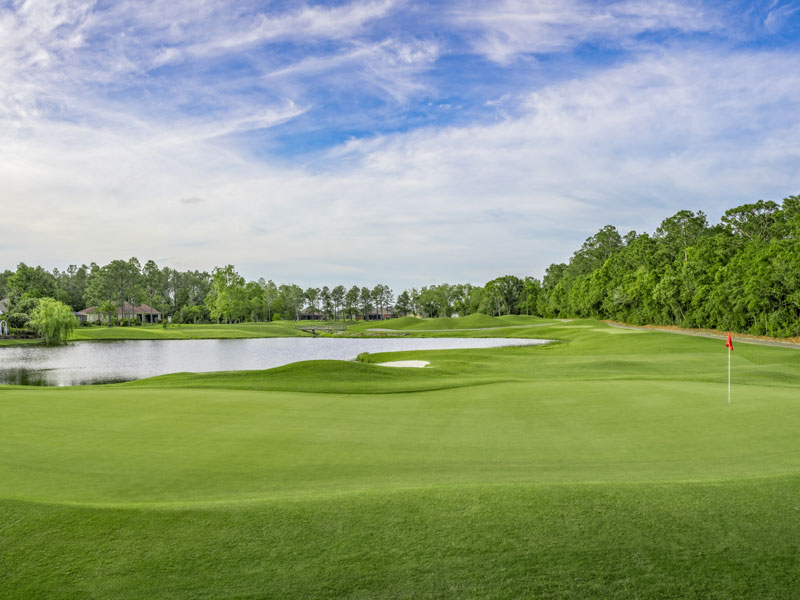
Golf Digest has consistently rated Cotton Creek as one of the best places to play! This 4-star course, located in Gulf Shores, Alabama, features tree-lined, rolling fairways surrounded by lakes. The lush course is challenging for low handicap players but with five staggered tee boxes, it is a fun challenge for golfers at any level.
COTTON CREEK COURSE STATS

HOLE 1
HOW TO PLAY HOLE 1
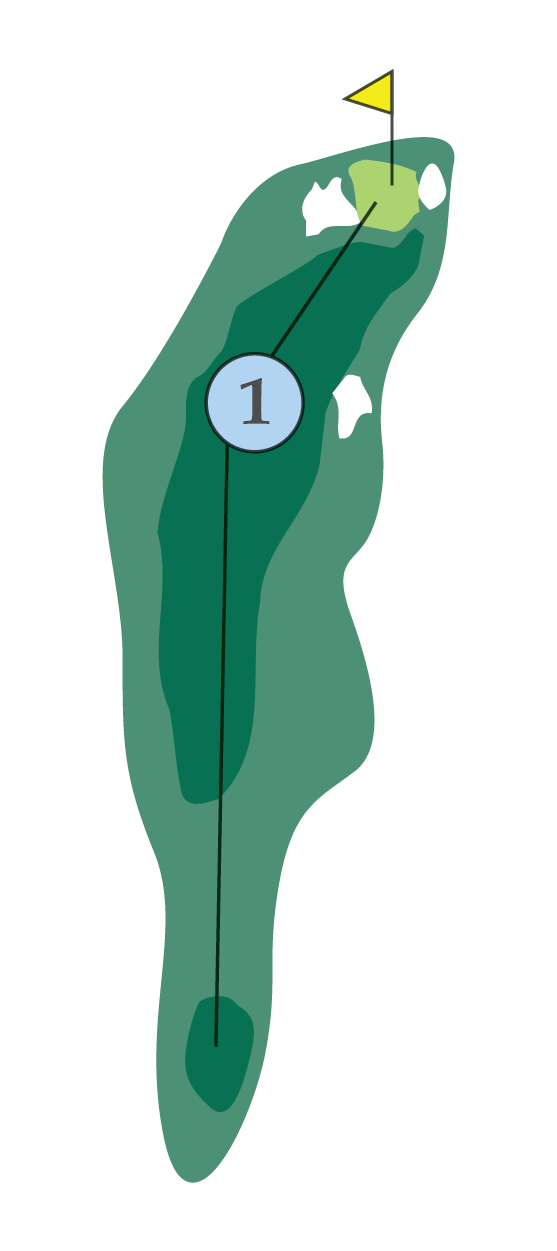
With a slight dog leg to the right, the ideal tee shot favors the left side to avoid the fairway bunker. The second shot is typically a short to mid-iron into a narrow kidney shaped green with bunkers on both sides.
HOLE 2
HOW TO PLAY HOLE 2
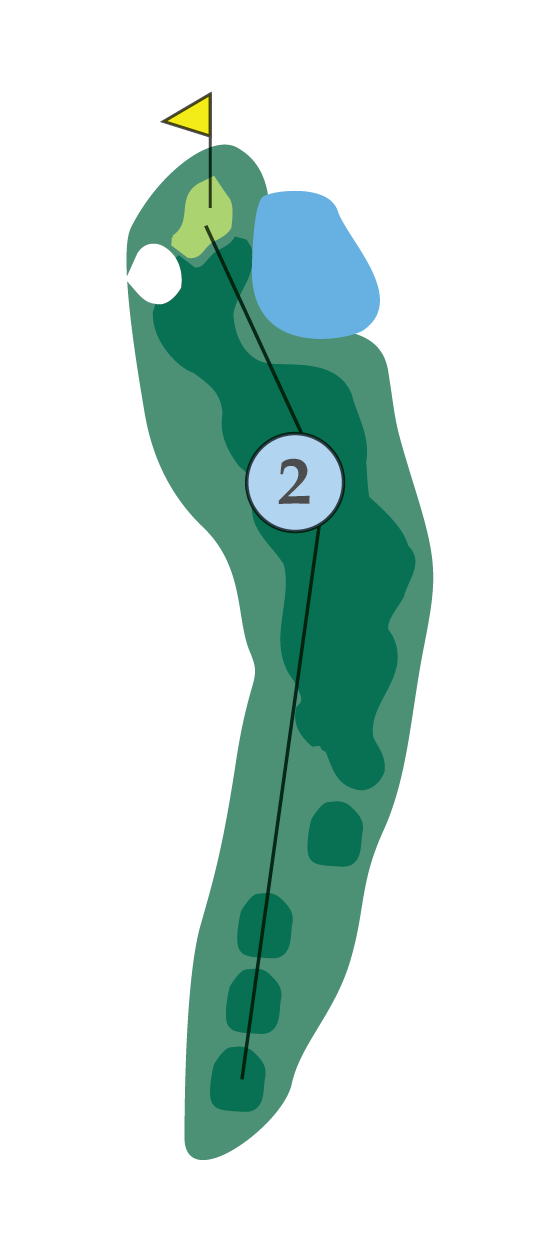
This hole demands a solid tee shot. It’s best to favor the right side of the fairway to open up a full view of the green. Proper club selection is key for the second shot to avoid the bunker that guards the front of the green.
HOLE 3
HOW TO PLAY HOLE 3
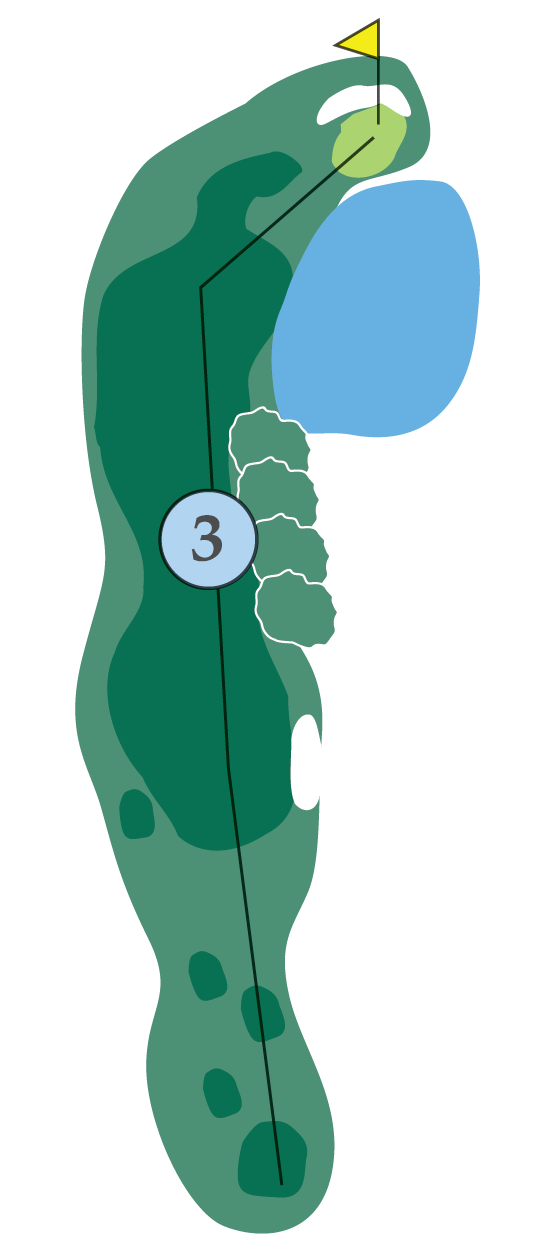
This hole requires three shots to reach the green. A generous driving area allows the player to let it fly from the tee. The second or lay up shot is the most important. Avoid the water on the right. The green is guarded by both water and sand.
HOLE 4
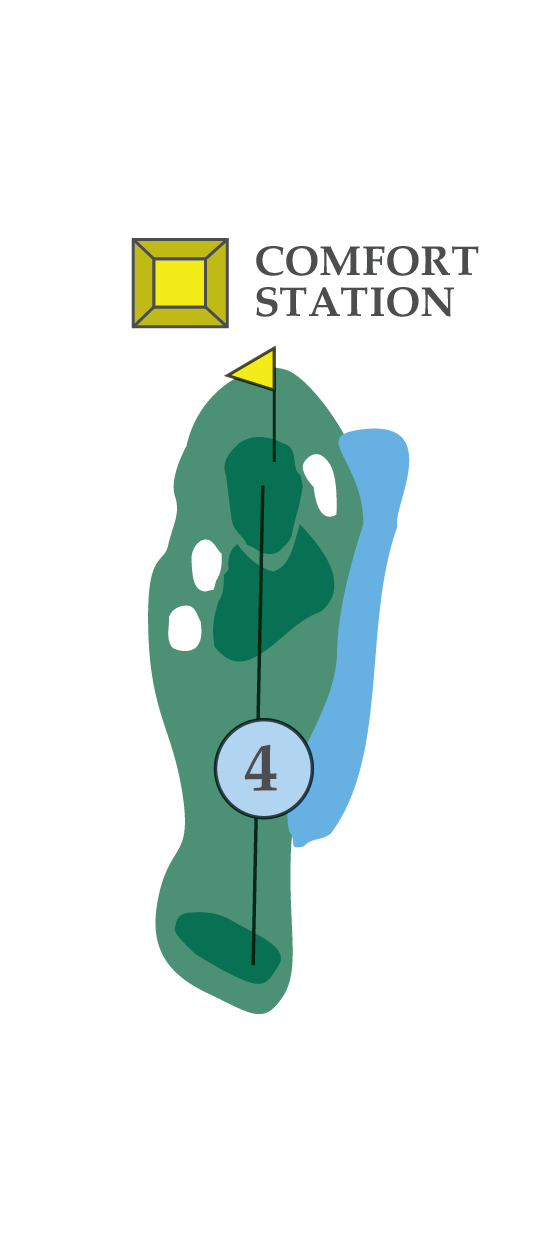
HOW TO PLAY HOLE 4
With bunkers guarding the left and right of the green, pay attention to club selection from the tee.This two-tiered green makes accurate putting a must to secure a par.
HOLE 5
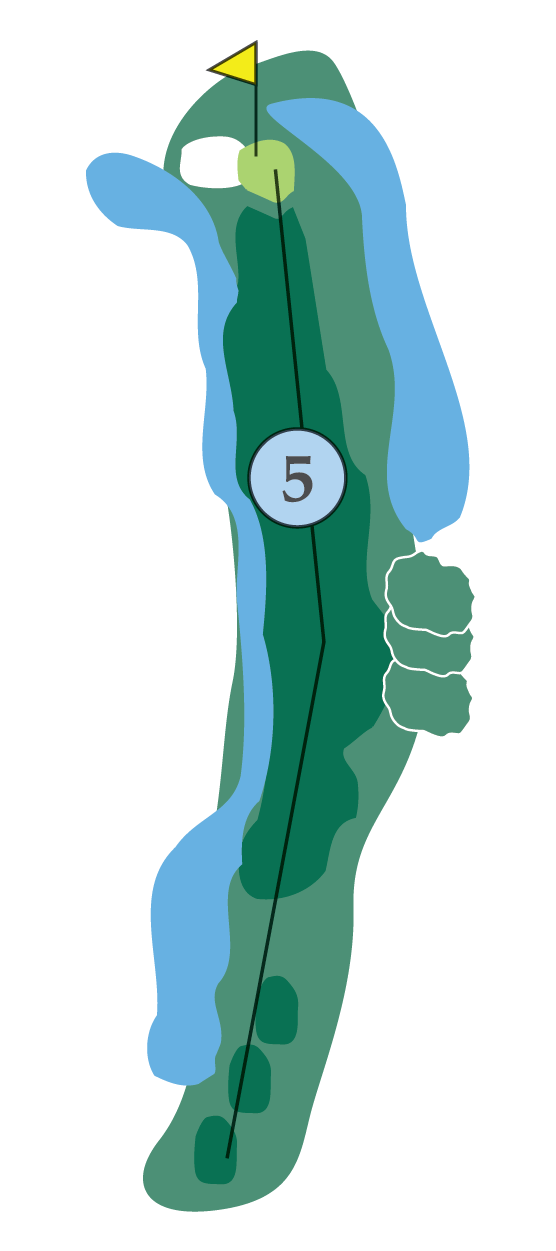
HOW TO PLAY HOLE 5
Guarded by marsh to the left, this long, straight hole has only one bunker to the left of the green and water down the right side. Distance off the tee is key to making a good score on the hole.
HOLE 6
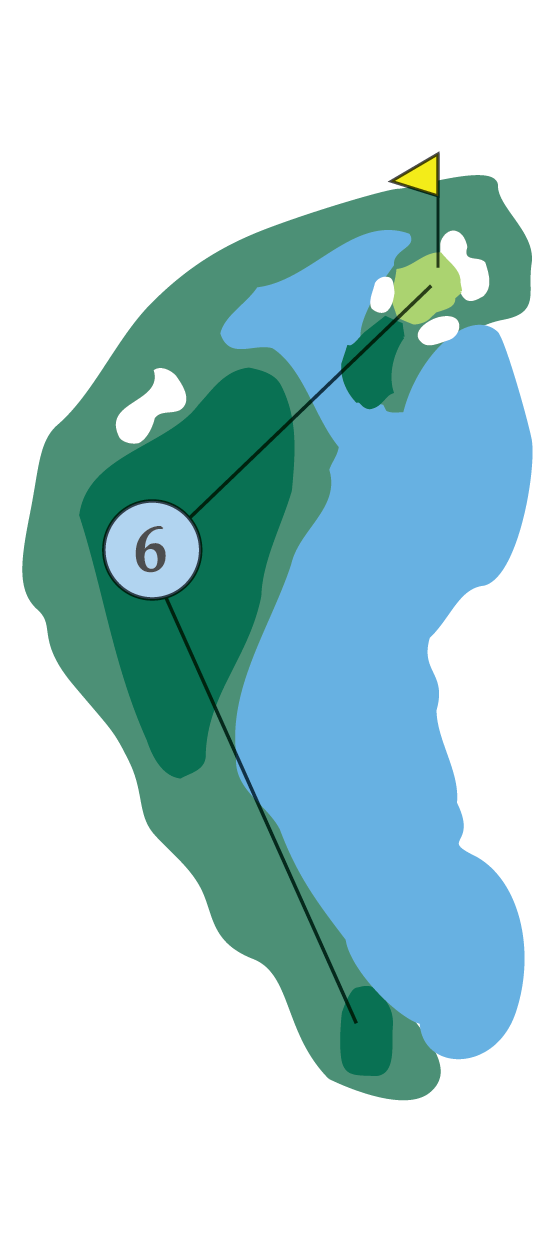
HOW TO PLAY HOLE 6
The first of two risk/reward holes, the dogleg right challenges golfers to cut off as much fairway as they dare. An aggressive tee shot will leave a short shot onto a green that is protected by bunkers and water.
HOLE 7
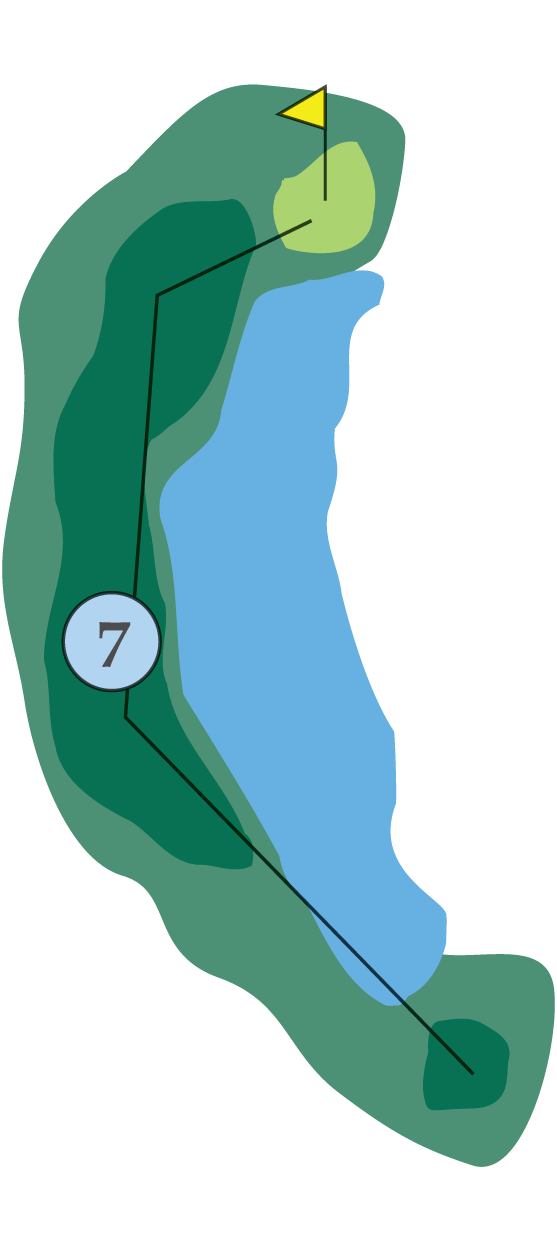
HOW TO PLAY HOLE 7
Another risk/reward opportunity, this green is reachable in two with an aggressive tee shot. There’s plenty of room off the tee for a safe shot but a layup is guaranteed. Water guards the right side and anything on the left is out of bounds.
HOLE 8
HOW TO PLAY HOLE 8
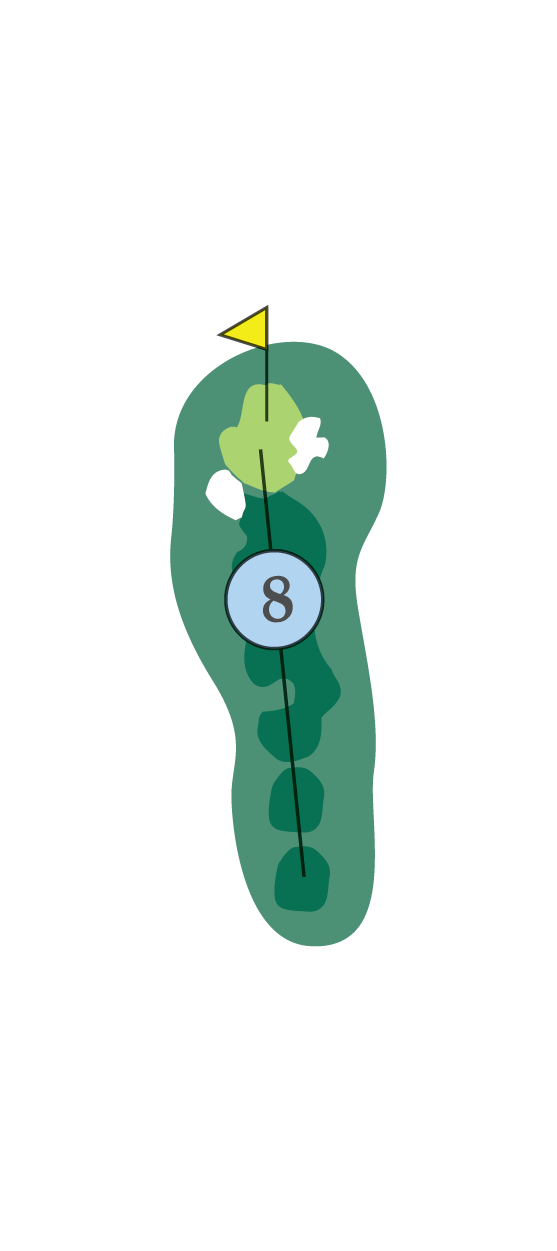
The easiest hole on the front nine, this short hole is guarded by bunkers on both sides. The large green makes an accurate shot and solid putting the key on this hole.
HOLE 9
HOW TO PLAY HOLE 9
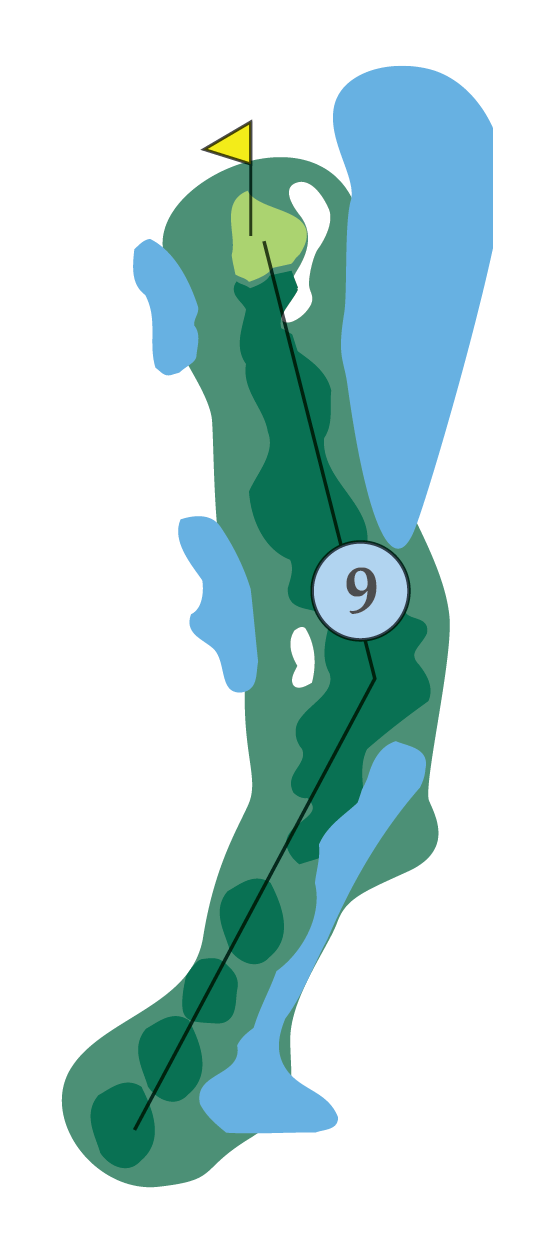
With a dogleg hard to the left, a proper tee shot aimed at the Craft Farms Clubhouse will set up the second shot for a mid-iron onto a generous green that is guarded by a large bunker to the right.
HOLE 10
HOW TO PLAY HOLE 10
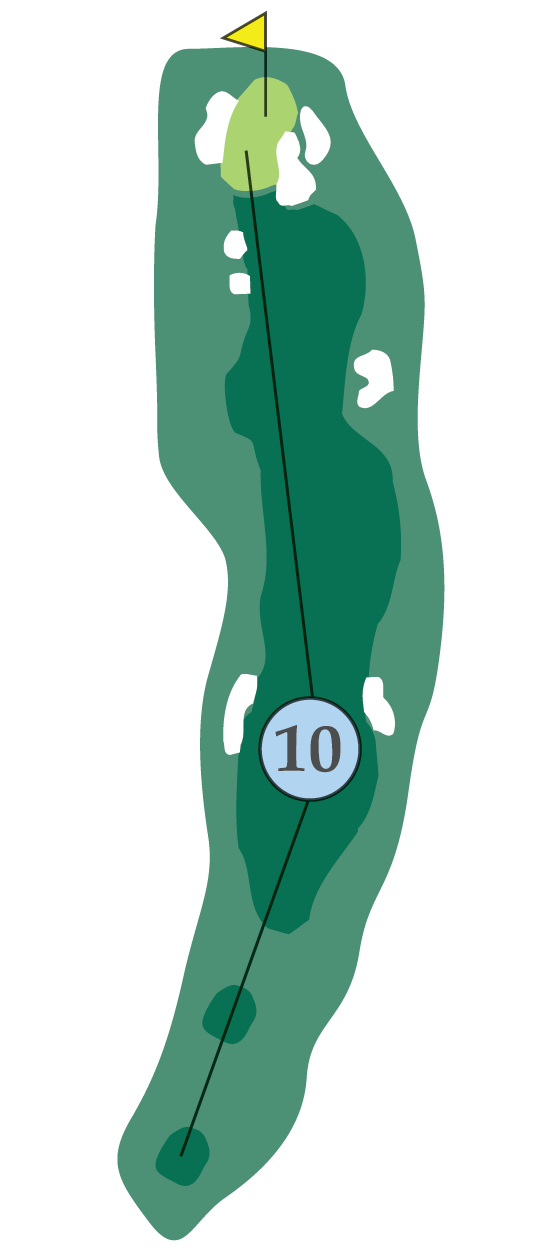
It’s possible to reach the green with two solid shots on this hole. Bunkers guard the left side of the fairway from the tee and a long tee shot past them will set up a good shot at the green. The green is guarded by two bunkers in front and one in the back.
HOLE 11
HOW TO PLAY HOLE 11
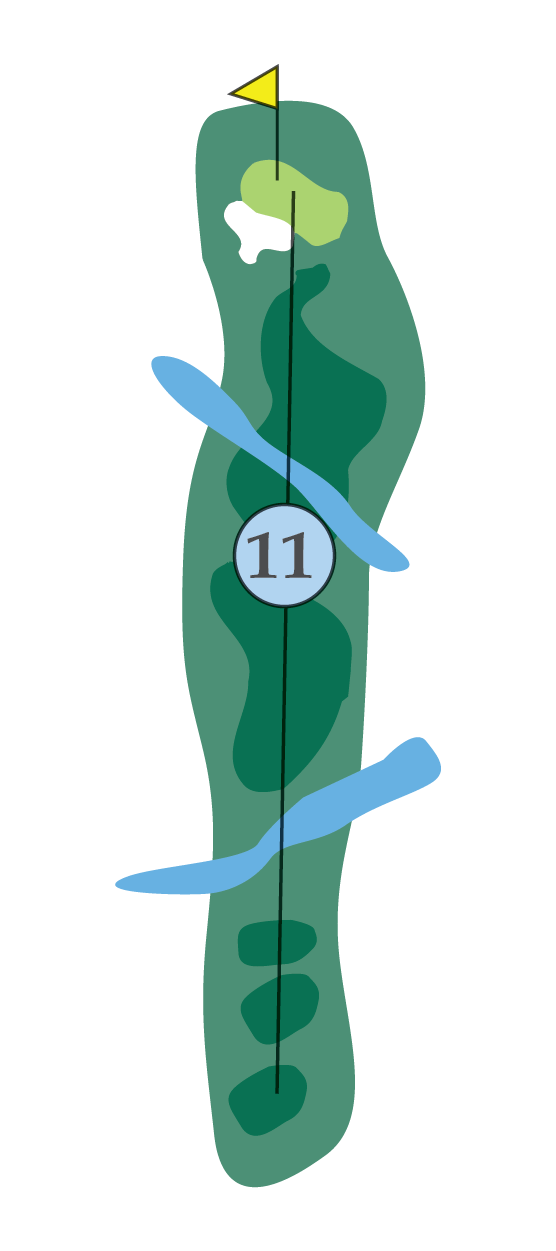
With the beautiful Cotton Creek cutting across the fairway, the second shot finds a two-tiered green guarded by a bunker to the front and left. Club selection is critical here.
HOLE 12
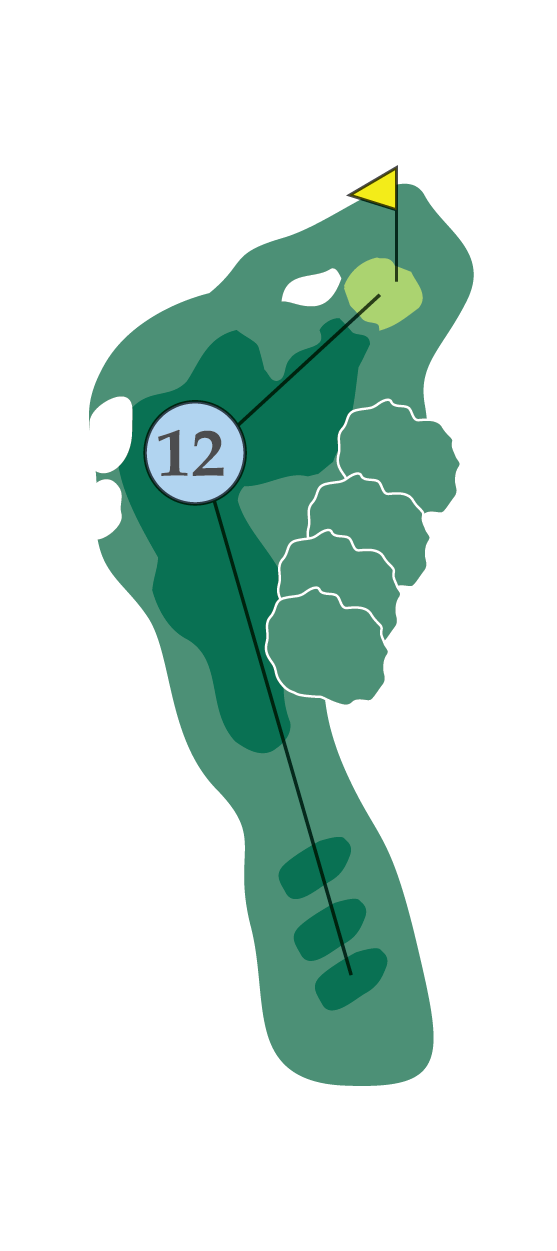
HOW TO PLAY HOLE 12
The sharp dogleg to the right requires a solid tee shot and leaves a short second shot to a two-tiered green guarded by a large bunker in the front.
HOLE 13
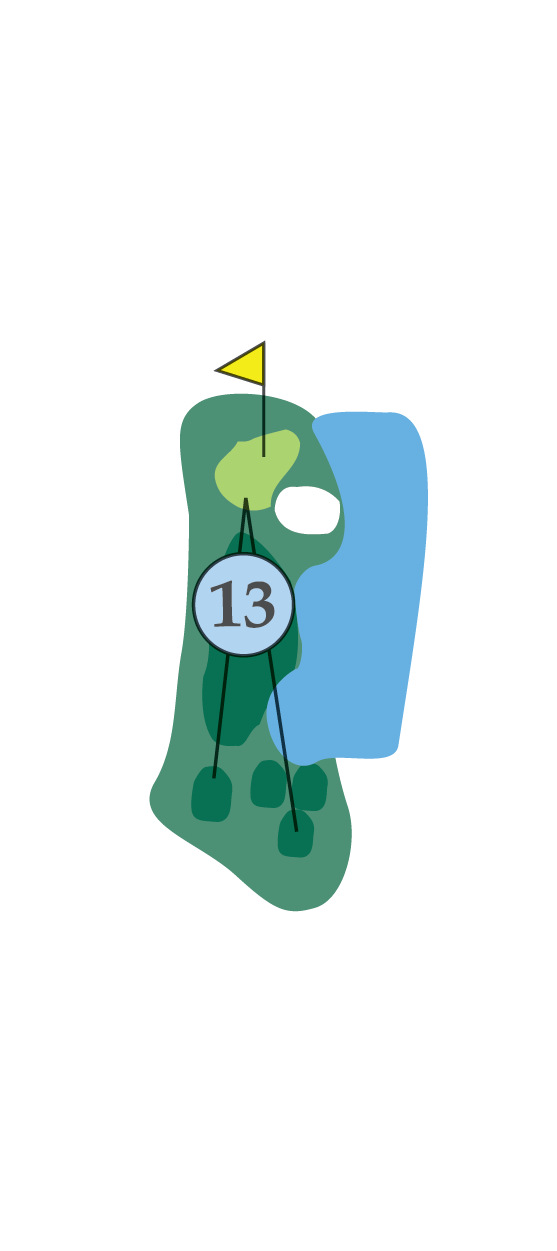
HOW TO PLAY HOLE 13
With the first shot over water, proper club selection is needed to hit this double-tiered green. The water does not come into play unless the tee shot is really miss hit.
HOLE 14
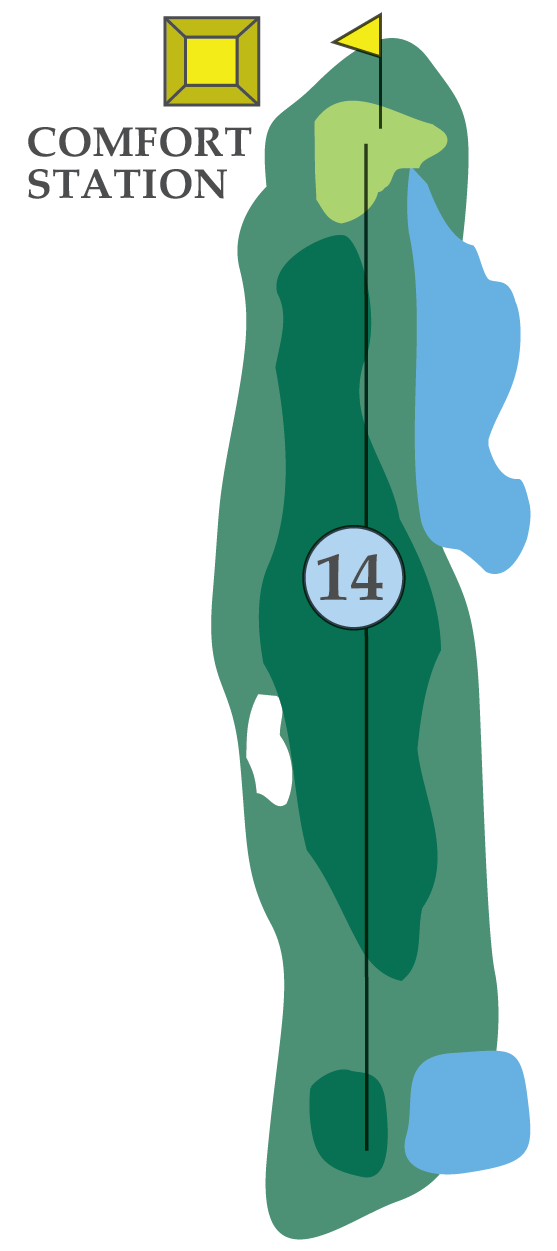
HOW TO PLAY HOLE 14
This is the toughest hole on the back nine. A fairway bunker on the left side has to be avoided. Favor the right side of fairway off the tee and be prepared for a long second shot to an undulating green that is protected by water to the front and right.
HOLE 15
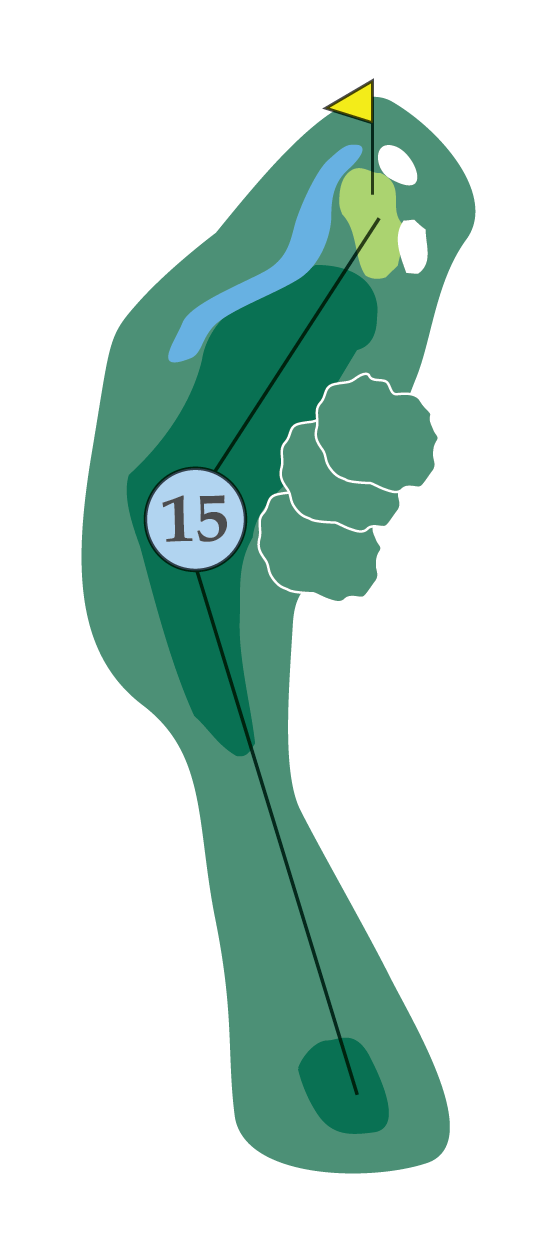
HOW TO PLAY HOLE 15
With a sharp dogleg to the right, the tee shot needs to avoid the trees to the right and be long enough to have an open second shot to the green. The green is guarded by bunkers and Cotton Creek to the left.
HOLE 16
HOW TO PLAY HOLE 16
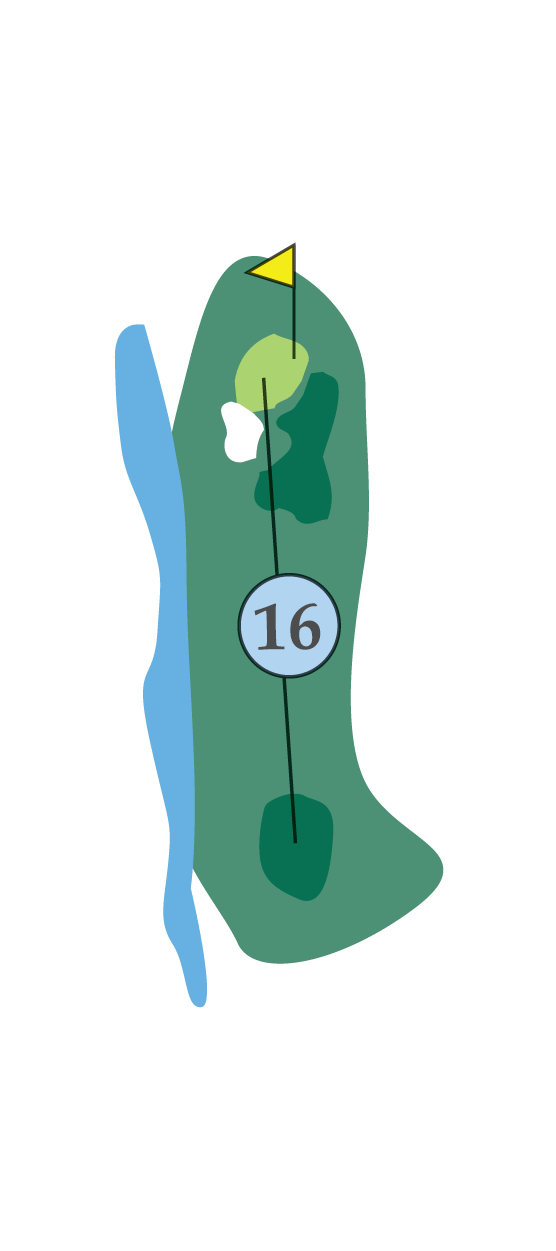
Make sure to avoid the bunker guarding the left side of the green. A swell in front of the green prevents short tee shots from bouncing onto the green surface so club selection is crucial.
HOLE 17
HOW TO PLAY HOLE 17
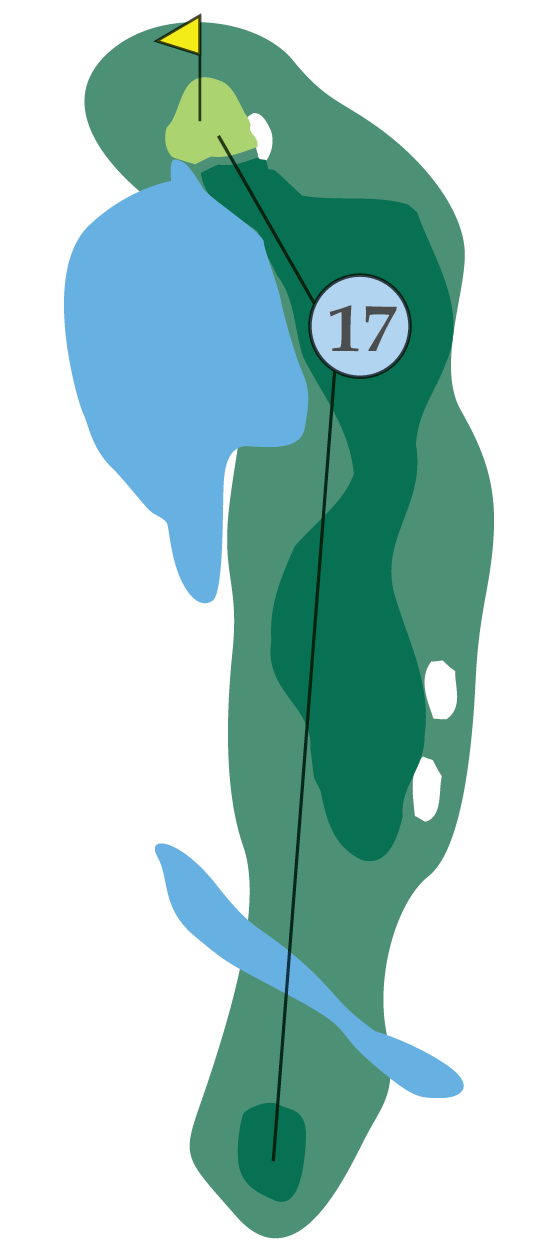
Reachable in two shots, the tee shot should avoid the bunkers to the right to have a chance to reach the green. The second shot can be an easy lay up or try to reach the green that is guarded by a bunker to the right and water to the front and left.
HOLE 18
HOW TO PLAY HOLE 18
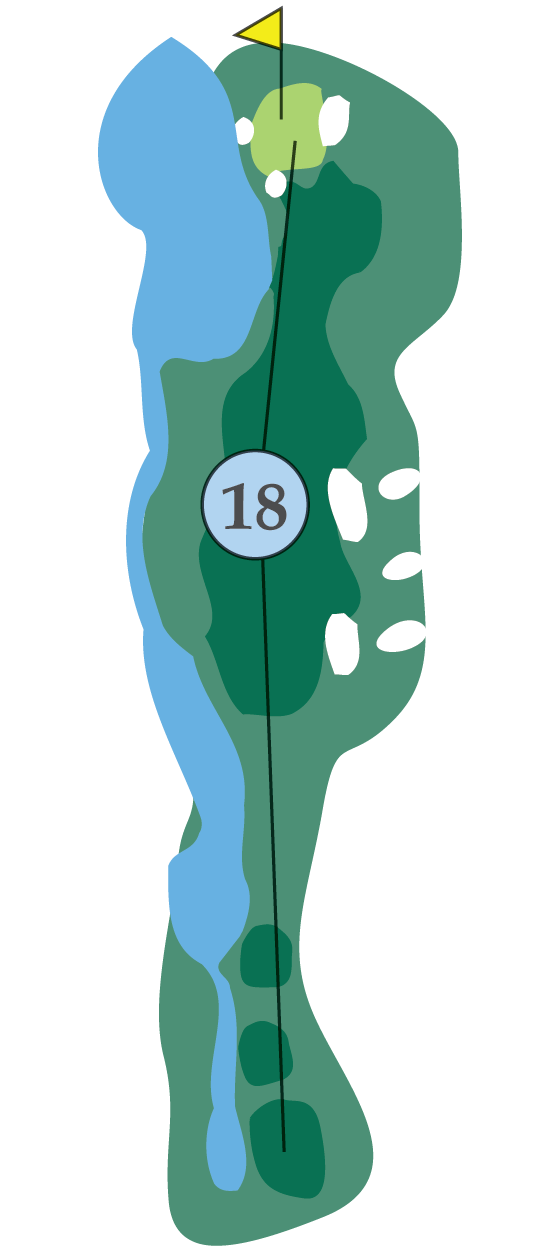
This great finishing hole demands length and accuracy. Avoid the multiple bunkers to the right and the water that guards the entire left side. A solid drive leaves a mid-iron to an undulated green guarded by water and bunkers. Pin location makes a difference on this hole.
